Intent automation
Intents are automation modules that can be used in Triggers to recognize input from visitors. Speaking of intents, we should note the following fact: an intention is a task that is formulated by a certain cue.
Creating an Intent:
To create an Intent, the user must go to the form/automations page. After that, it is possible to create the Intent in two ways:
- The first is by creating a new automation and trigger;
- The second is by editing an existing trigger.
Go to the automation form and click the NEW button.

In the popup that appears, fill in the NAME field with any data. Leave the other fields and switches as they are displayed by default. Then click on the SAVE button. In other words, the user has creates a new automation.

Next, click in the list on the name of the created automation and go to the form of editing it.

On the automation editing form, click the ADD RULE button.

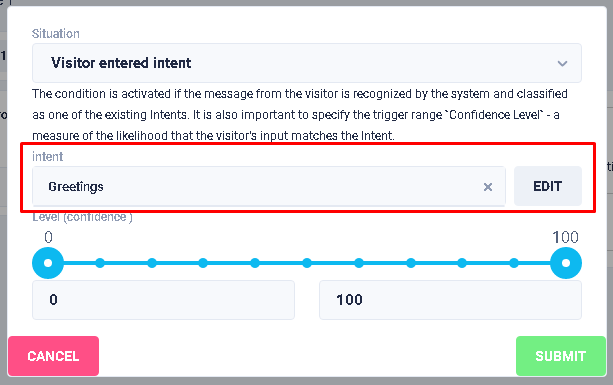
After that, in the appearing popup in the Situation field in the drop-down list select the value - Visitor entered intent and click on the NEW button.

After the user clicked on the NEW button, the form of creating the Intent will be displayed.

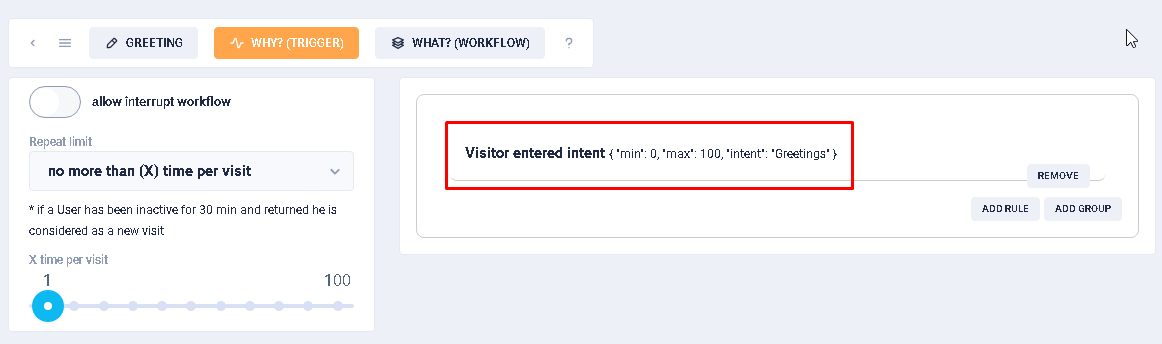
On the automation form, go to the automation that has a trigger with the rule - Visiter entered intent (for example: Greeting).
In the window that appears in the Intent field, remove the value there by clicking on the element - "x".
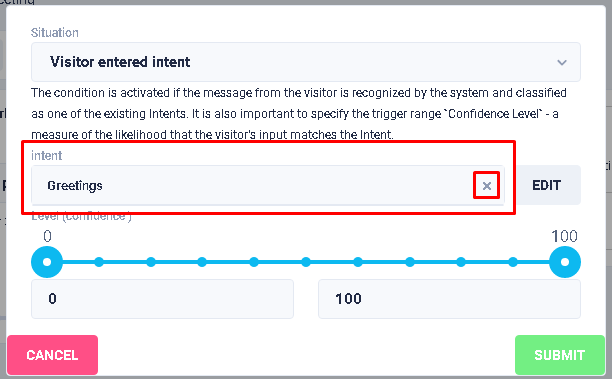
After that, the EDIT button will be automatically renamed to NEW….
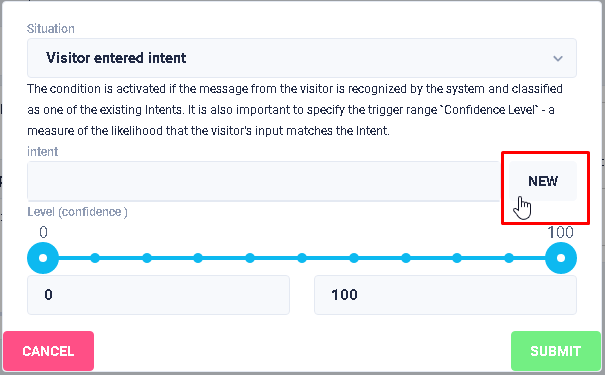
…… and by clicking on it the user will see the form of creating the intent.
The intent creation card has the following attributes (or card field elements):
- Field NAME

In this field you must specify the name of the new Intent for further easy and quick identification in the system. In this field you can enter characters that meet the following requirements:
- The name can be from 1 to 255 elements inclusive.
- The entered characters (elements) can be of any alphabet (Latin, Chinese, Russian, etc.).
- Characters (elements) can be in upper register, lower register or mixed register.
- You can enter any numeric value.
- You can enter any special characters (for example: brackets, percentages, commas, etc.).
- It is possible to save the name if only characters such as - "space" are entered.
- It is possible to move text characters (e.g. from a text editor). It isn't possible to move any files into this field.
- Field TERMS

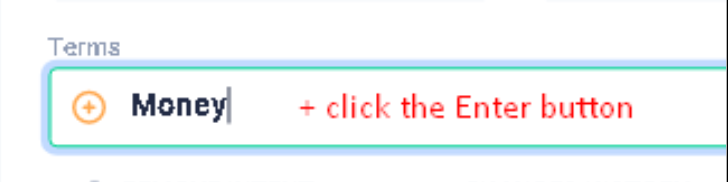
This field contains a list of values which are the main content of the Intent. To add a value, click on the TERMS field. Then enter the desired value and click the ENTER button. It is recommended to create at least three Terms values to work correctly.
In this field you can enter characters that meet the following requirements:
- The value must be at least one character.
- The entered characters (elements) can be of any alphabet (Latin, Chinese, Russian, etc.).
- Characters (elements) can be in upper register, lower register or mixed register.
- You can enter any numeric value.
- You can enter any special characters (for example: brackets, percentages, commas, etc.).
- It is possible to save the name if only characters such as - "space" are entered.
- It is possible to move text characters (e.g. from a text editor). It isn't possible to move any files into this field.
After the ENTER button is clicked, the value(s) is displayed above the TERMS field as a tag(s).

If you want to delete the created value, you should click on the X element in the tag. The system has the ability to edit the tag. To edit a value, click on the tag. After that a second pop-up window will be displayed.
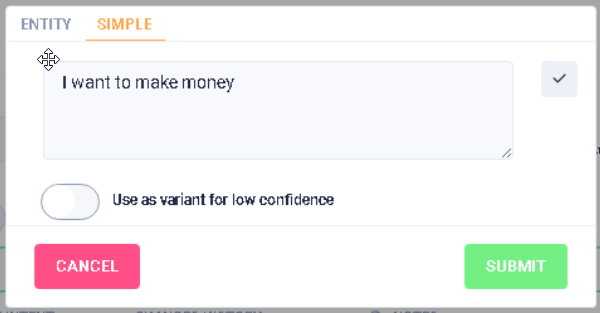
In the edit window, the SIMPLE tab is active by default. In the edit box, it is possible to make adjustments to the value (tag).
It is possible to edit the value (tag) extensively. To do this, click the ENTITY tab.
In order for this Terms value to be offered, the Intent's special toggle checkbox - Use as variant for low confidence must be enabled. To do this, select the TERMS value you are interested in by clicking the mouse and in the window that opens, switch Use as a variant for low confidence to the “ON” position.
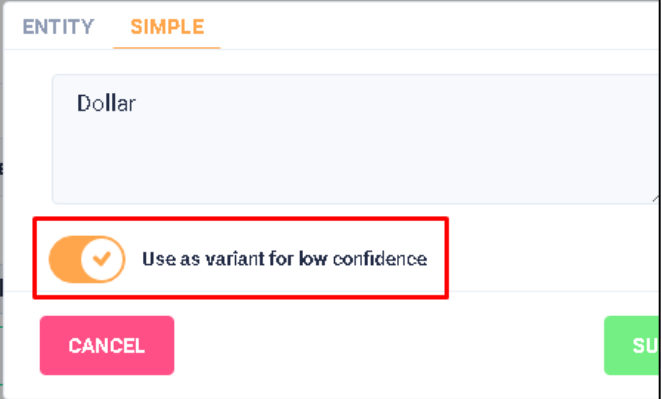
To save the changes, click the SUBMIT button. After that the editing window closes automatically and the changes are saved. Clicking the CANCEL button closes the window, and the changes made will not be saved.
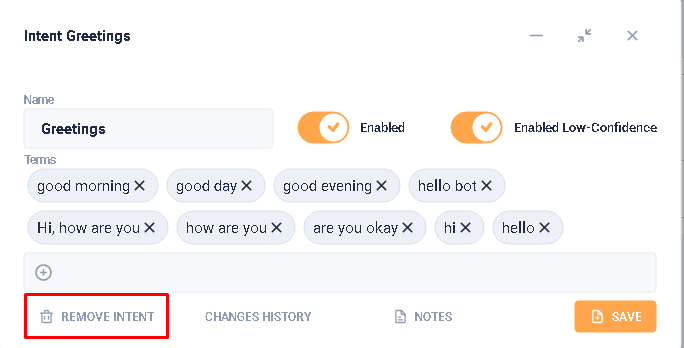
- ENABLED checkbox

It is the checkbox of general toggle Intent. This checkbox allows you to temporarily enable or disable an Intent. It is worth noting that disabled Intents aren’t taken into account by the system when determining the match level of the phrase being checked. By default, the checkbox is always active.
- Enabled Low-Confidence checkbox

It is Special toggle Intent. By default, the checkbox is always active. Some of the values can be highlighted. This selection is for the following situation, when a message to the bot is entered, but it (because of low Confidence) cannot be used by any of the available triggers.
Editing the Intent:
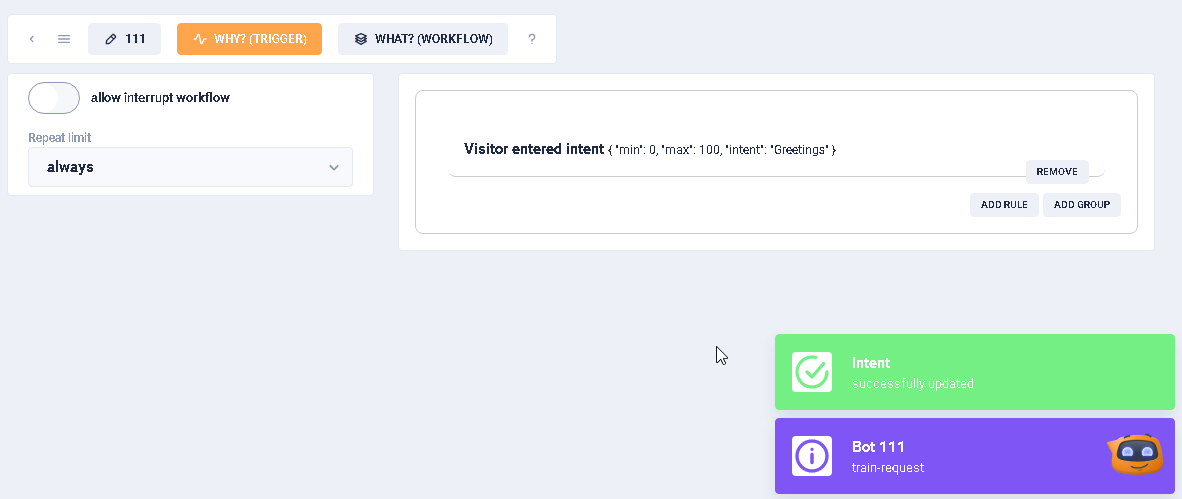
To make changes to an existing Intent, go to the Edit Automation page. On this page, click the Why? (trigger) button (if it isn't active by default) and find the trigger for which the following rule is prescribed - Visitor entered intent.
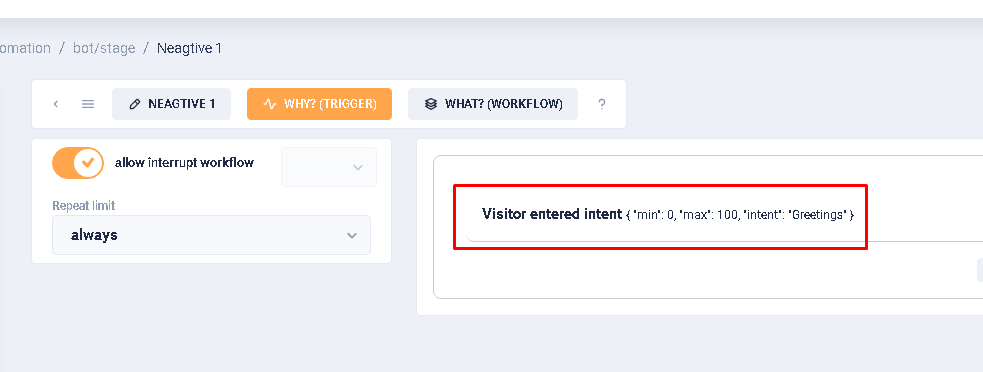
Clicking on this rule the user will see a popup with the name of the intent and the EDIT button.
Saving the Intent:
When all required fields are filled in (or changes made), it is possible to save the Intent. In order to do this you need to click on the SAVE button.

If the ENABLED and ENABLED LOW-CONFIDENCE checkboxes are active or deactivate or if the ENABLED checkbox is disable and ENABLED LOW-CONFIDENCE checkbox is active and vice versa, then after saving the Intent, two notifications appear in the lower right corner of the browser screen. The first: about the successful creation of the Intent. The second: the need to train the bot.
If changes are made but you don't click the SAVE button and close the card, the changes remain in the card, but are not saved.
Deleting the Intent:
To delete an existing Intent, in the list of intents, click in the NAME column on the Intent to be deleted. In the lower left corner of the Intent card, click the REMOVE INTENT button. After that, the Intent card automatically closes and the Intent is removed from the list.
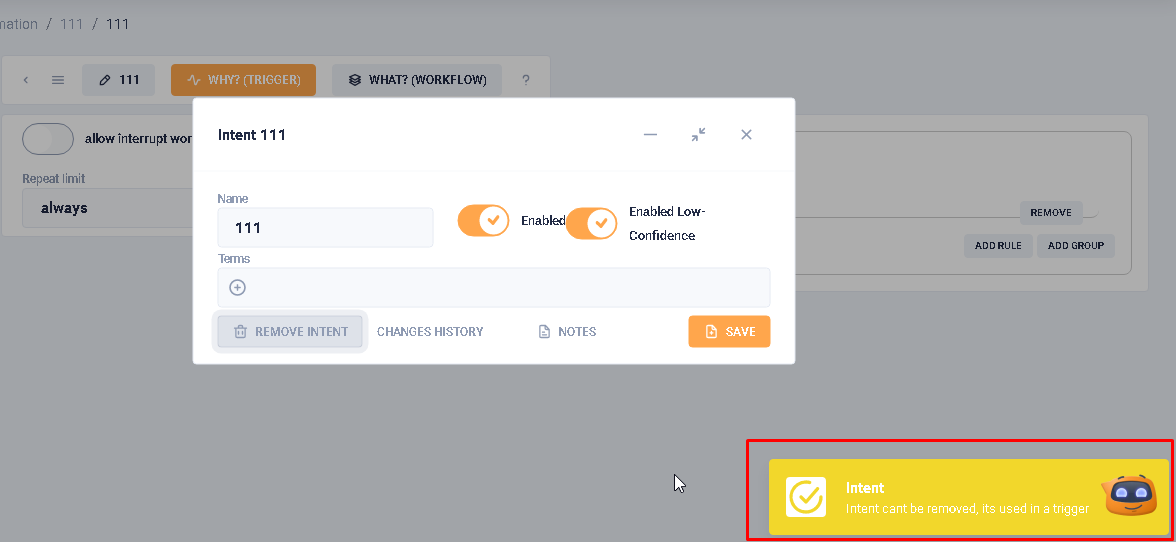
It is worth noting that if you click on REMOVE INTENT in the Intent creation card, a pop-up message will appear in the lower right corner saying that this action cannot be performed on an Intent that has not yet been created.
Tracking the history of changes to the Intent:
It is possible to track how a particular Intent has changed. To do this, in the list of the Intents, click in the NAME column on the name of the desired Intent. Click the CHANGES HISTORY button in the lower part of the appeared Intent card.

The window that appears contains a list of changes that have been made to the specific Intent. The list contains the date and time of the change, the Email of the person who changed the Intent, and what exactly was changed.
Creating a note to the Intent:
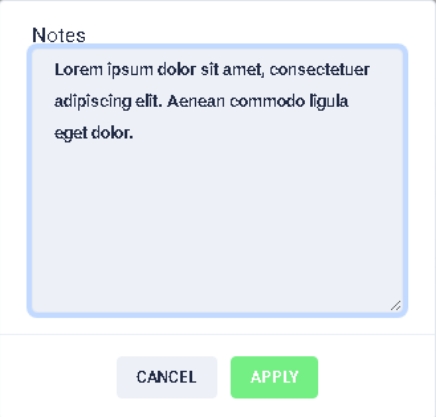
To create an Intent note, in the list of intents, click in the NAME column on the desired Intent. Click the button in the lower part of the Intent card that appears.

After that, a window will be displayed in which it is possible to create a note.
Actions with the Intent card:
In the upper right corner of the Intent card, there are buttons that allow to minimize (1), fix (2), or close (3) it.

When the user clicks item Collapse (1), the card minimizes its size and collapses to the lower right corner. When the user clicks item Fix (2), the card doesn't change its size and is fixed in the lower right corner. And if the user clicks item Close (3) the card closes and changes are not saved.
Check the LowConfidence value:*
For example, if there is such a Terms in the Intent, the level of which is higher than the LowConfidence threshold set in the bot, then the Trigger in which this Intent is in the “Visitor entered intent” activation condition will be activated. In other words, the Intent will work and execute the corresponding Workflow assigned in its “Execute function” setting.
The Terms level can be checked by following these steps: Bot -> Settings -> Common -> Preferences -> Field The lower bound of the match level for "Intents" (0-1). On the page that opens, pay attention to the value of the field The lower bound of the match level for "Intents" (0-1).

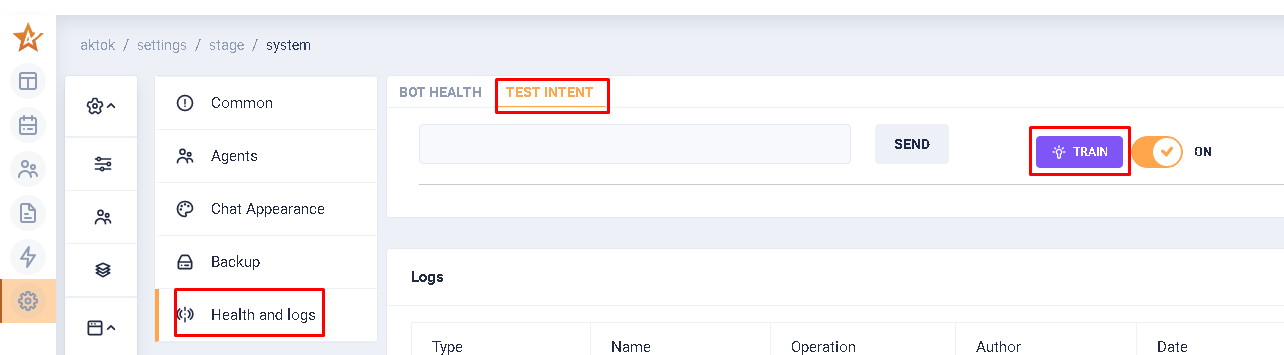
Checking for current (active) Intent in the system
In order to check the presence of current (active) Intents in the system and their compliance with the tested (presumed) phrase of the visitor, you must perform the following steps:
- Go to the bot settings;
- Select the Health and logs section;
- Go to the Test intent tab;
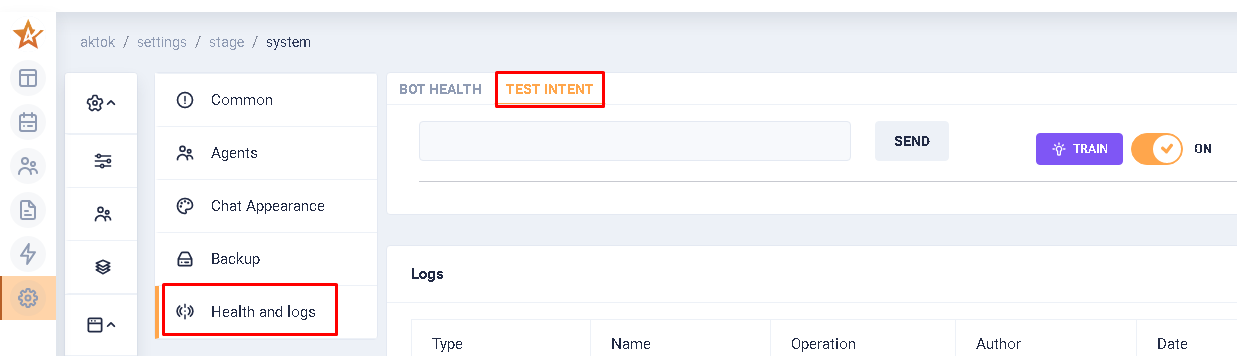
- In the opened form for checking intents, specify the phrase to be checked;
- Click the Send button.

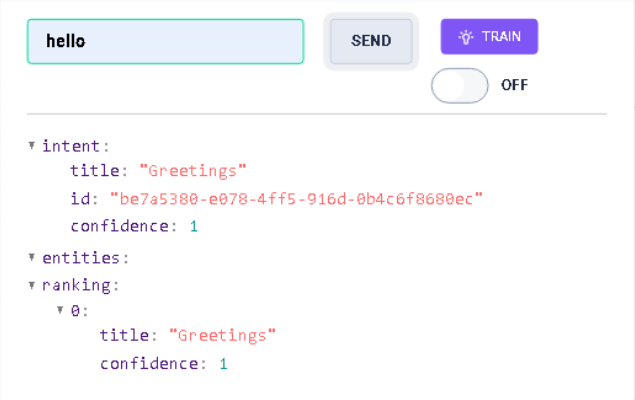
As a result a list of available intents will be displayed:
- the name of the most relevant Intent (1);
- id of the most relevant Intent (2);
- the level of matching of the checked phrase with the value of Terms available in the Intents (3).
- If the switch is set to "ON", the less relevant search word/phrase Intents are also displayed (4).

If the switch is set to the "OFF" position, the less relevant Intents aren't displayed for the searched word/phrase.
Bot training:
If any changes were made to the Intent, then for the correct operation of the bot, it is necessary to carry out the procedure for training it. To do this, you need to take the following steps:
- Go to the bot settings;
- Select the Health and logs section;
- Go to the Test intent tab;
- Click the Train button.